Emacs: POV-Ray Mode
This page contains some tips on using the POV-Ray with the Emacs text editor. (If you are not familiar with them, see POV-Ray: Intro and Emacs Tutorial.)
POV-Ray Mode for Emacs
To have syntax coloring, get this pov-mode: https://github.com/emacsmirror/pov-mode , maintained by Marco Pessotto.
This mode features customizable syntax coloring, keyword completion, keyword documentation lookup, template insertions, integrated rendering and image viewing commands.
Useful Commands
Editing POV-Ray File
To complete a keyword, type Esc Tab (pov-complete-word).
To look up documentation of the keyword the cursor is on, type Ctrl+c Ctrl+c Ctrl+h (pov-keyword-help).
To open the “include” file the cursor is on, type Ctrl+c Ctrl+c i (pov-open-include-file).
Rendering
To render the current scene file, use the menu [Render], or type Ctrl+c Ctrl+c r.
The pov-mode provides several shortcuts for rendering at different qualities. Here's a table:
| Keys | Command Name | Meaning |
|---|---|---|
| Ctrl+c Ctrl+c r | pov-tool-bar-command-render | default quality |
| Ctrl+c Ctrl+c 1 | pov-menu-render-test | test quality |
| Ctrl+c Ctrl+c 2 | pov-menu-render-low | low quality |
| Ctrl+c Ctrl+c 3 | pov-menu-render-mid | midium quality |
| Ctrl+c Ctrl+c 4 | pov-menu-render-high | high quality |
| Ctrl+c Ctrl+c 5 | pov-menu-render-highest | highest quality |
Viewing Rendered File
To view the rendered image corresponding to the current scene file, type Ctrl+c Ctrl+c v (pov-menu-internal-viewer) or use the menu [View].
To view the rendered image in a external image viewer (such as Gimp), type Ctrl+c Ctrl+c e (pov-menu-external-viewer). You can customize pov-mode to setup what application you want to use as the external viewer (see Customization section below).
To see the rendering stats, type Ctrl+c Ctrl+c l (pov-show-render-output).
Customize povray-mode
The pov-mode supports emacs's graphical customization interface. To
enter customization, type
Alt+x customize-group, then give
pov. Then, a graphical user interface
with buttons will show up that lets you change default values. Press TAB
to the field you want to change, type the new value, then click the button
“Set for Current Session” or “Save for Future Sessions”. Then, you can
close the buffer (or click “Finish” to close the buffer). If you save for
furture session, emacs will automatically insert code to your emacs init
file (usually at ~/.emacs).
Here's a example of setting the command for “High quality render”.
- Type Alt+x customize-group then “pov”. I get a page with many buttons.
- Scroll down to “Pov Run High”, then type in the value field
+R2 +A0.1 +J1.2 +Am2 +Q9 +H480 +W640 +i%s, replacing the existing text there. - Scroll back to top and press “Save for Future Sessions”, then click “Finish”. Then, in my
~/.emacsfile, i can see this line added:'(pov-run-high "+R2 +A0.1 +J1.2 +Am2 +Q9 +H480 +W640 +i%s"). - Now, open a POV-Ray file, then type Ctrl+c Ctrl+c 4. When it is done, type Ctrl+c Ctrl+c v to view the file. The file is now rendered with my customized rendering command.
Custome Template Insertion
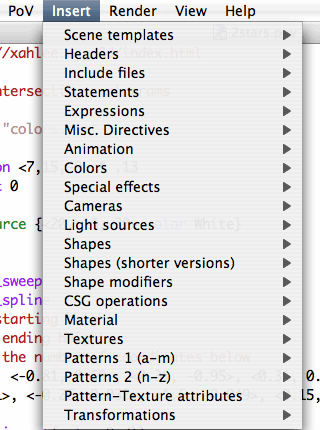
pov-mode supports insertion of template files thru the menu.
You can download the over 200 templates files (inc files, and templates for color, lighting, shape, transformation …etc) by Christoph Hormann, at:
To install the templates, unzip and untar the file, then place the folder “InsertMenu” inside pov-mode's folder, then restart emacs. Then, you will see a menu “Insert” after opening a POV-Ray file.
Misc Tips
Define Your Own Shortcut
You can define a function key for any of the pov-mode's commands or menu. For example, if you want F8 to be menu [Render ▸ Test quality] and F9 to be menu [Render ▸ Medium quality], put the following in your emacs init file.
(defun set-my-pov-mode-hotkeys  ()
  "Sets some convenient keyboard shortcuts for pov-mode."
  (interactive)
  (define-key pov-mode-map (kbd "<f8>") 'pov-menu-render-test)
  (define-key pov-mode-map (kbd "<f9>") 'pov-menu-render-mid)
  )

(add-hook 'pov-mode-hook 'set-my-pov-mode-hotkeys)
For detail on setting up keyboard shortcuts with other modifier keys, see How To Define Your Own Emacs Keyboard Shortcuts.
To find out the command name for a menu item, type Ctrl+h b, then pull the menu with the mouse.