Svalboard (Datahand)
Svalboard
Svalboard came out around 2023. It is built and sold by Morgan Venable.
Svalboard is essentially a remake of the Datahand.
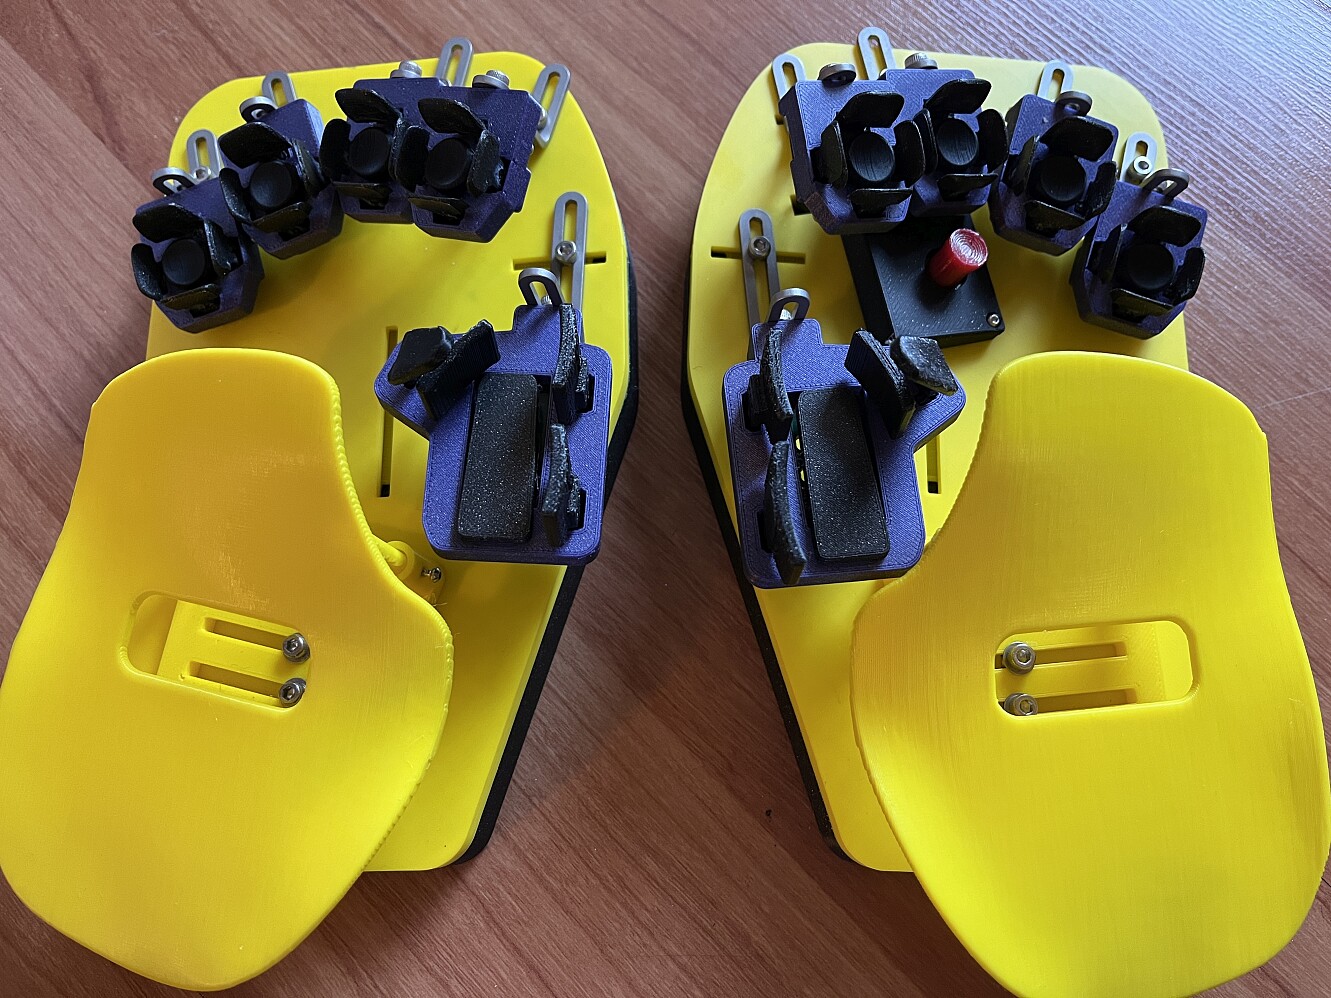
Quick Start. Connect the Keyboard
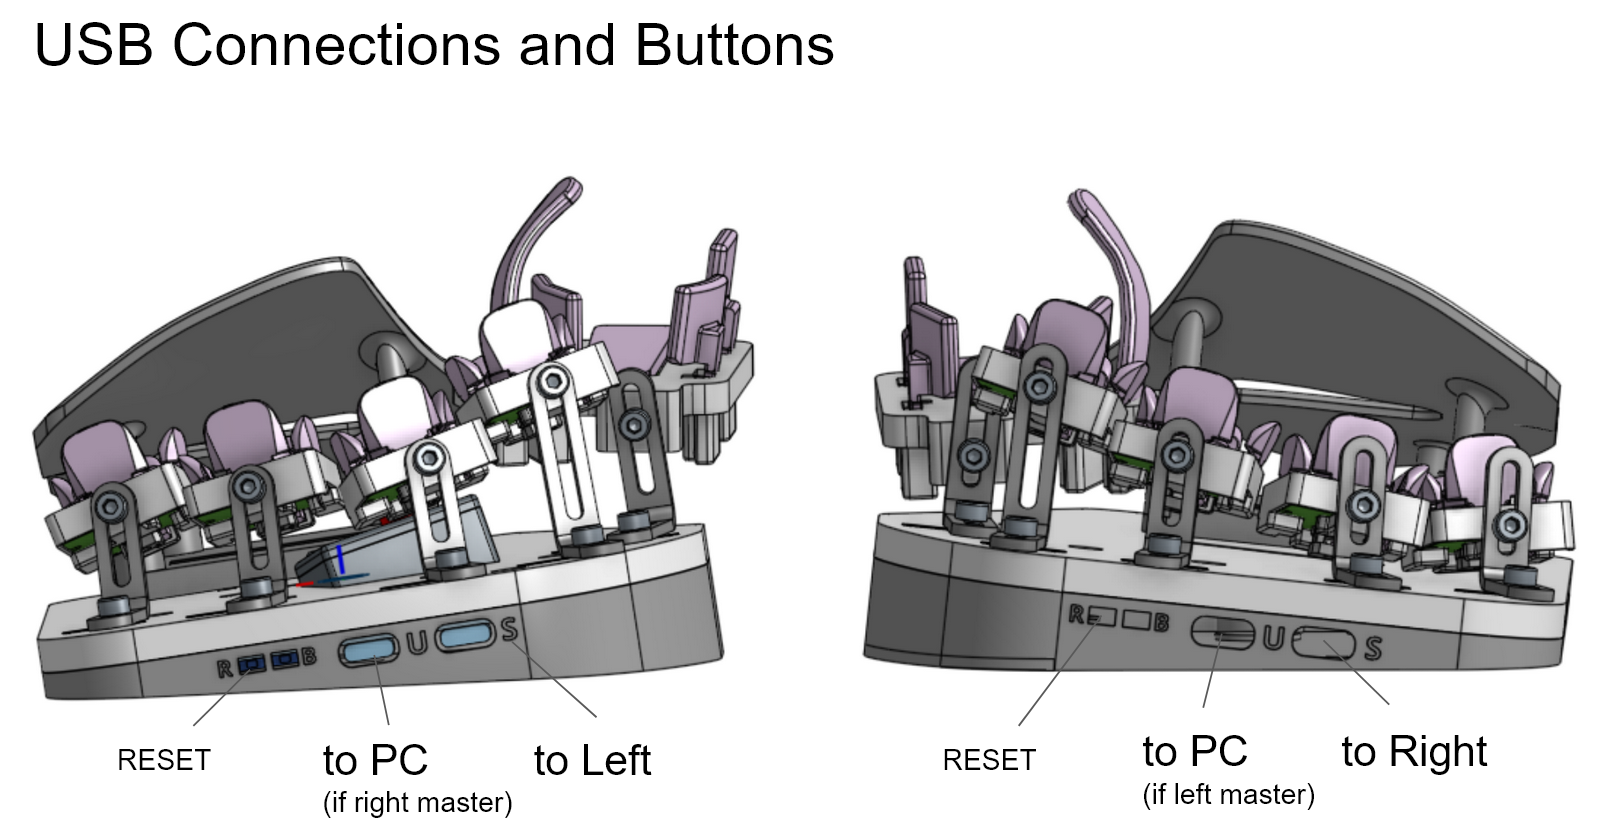
- Connect the two components together.
- Connect one component of the keyboard to the computer. (it should be the part with the trackpoint or trackball on it, if you have that. Else, doesn't matter which.)
🟢 TIP: to connect 2 parts together, one end of cable goes to the inner port, and the other end goes to the outer port on the other. (as opposed to, the more common configuration of connecting both inner ports.)
Now you can start typing on it.
Svalboard Datahand Exploration 📺

First Impression
- Magnetic switches. Very light. Somewhat comparable to switches with 30g activation force.
- My first impression is, it's quite amazing.
- The swith checks out, the workability checks out, and for this particular svalboard, quality checks out. Very simple device, scientific, no frills.
- And, i think the potential, for chording, is immense. If you are into that.
- You can just use it normally. But if you are a diddler, you can start to explore chording. This beats any pc keyboard emulating Stenotype Machine.
- The magnetic switches, are super light, and is truly great.
Finger Keys
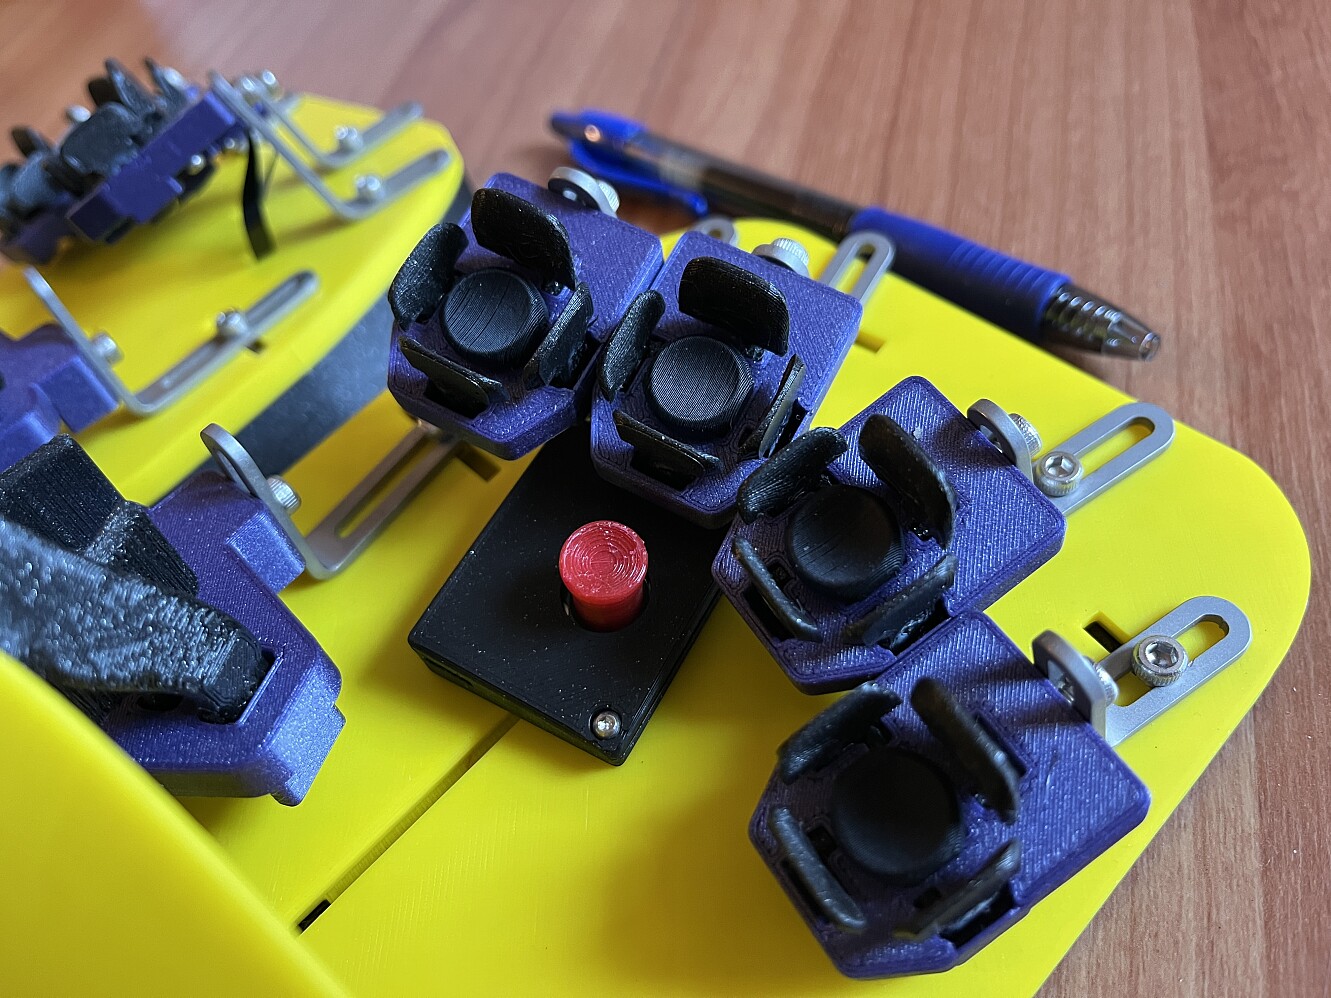

For each finger, you got 5 buttons. North south east west, and pushing down.
The keymap is rather simple. Imaging it's just like normal keyboard. If you need to press upper row, hit the north wall. If bottom row, hit south wall.
And for those columns in the middle, e.g. G and H is inward with left or right index finger.
For diagnal middle keys, they are also pressed by inward motions. T is left middle inward, B is left ring inward, Y is left middle, N is left ring.
Thumb Keys
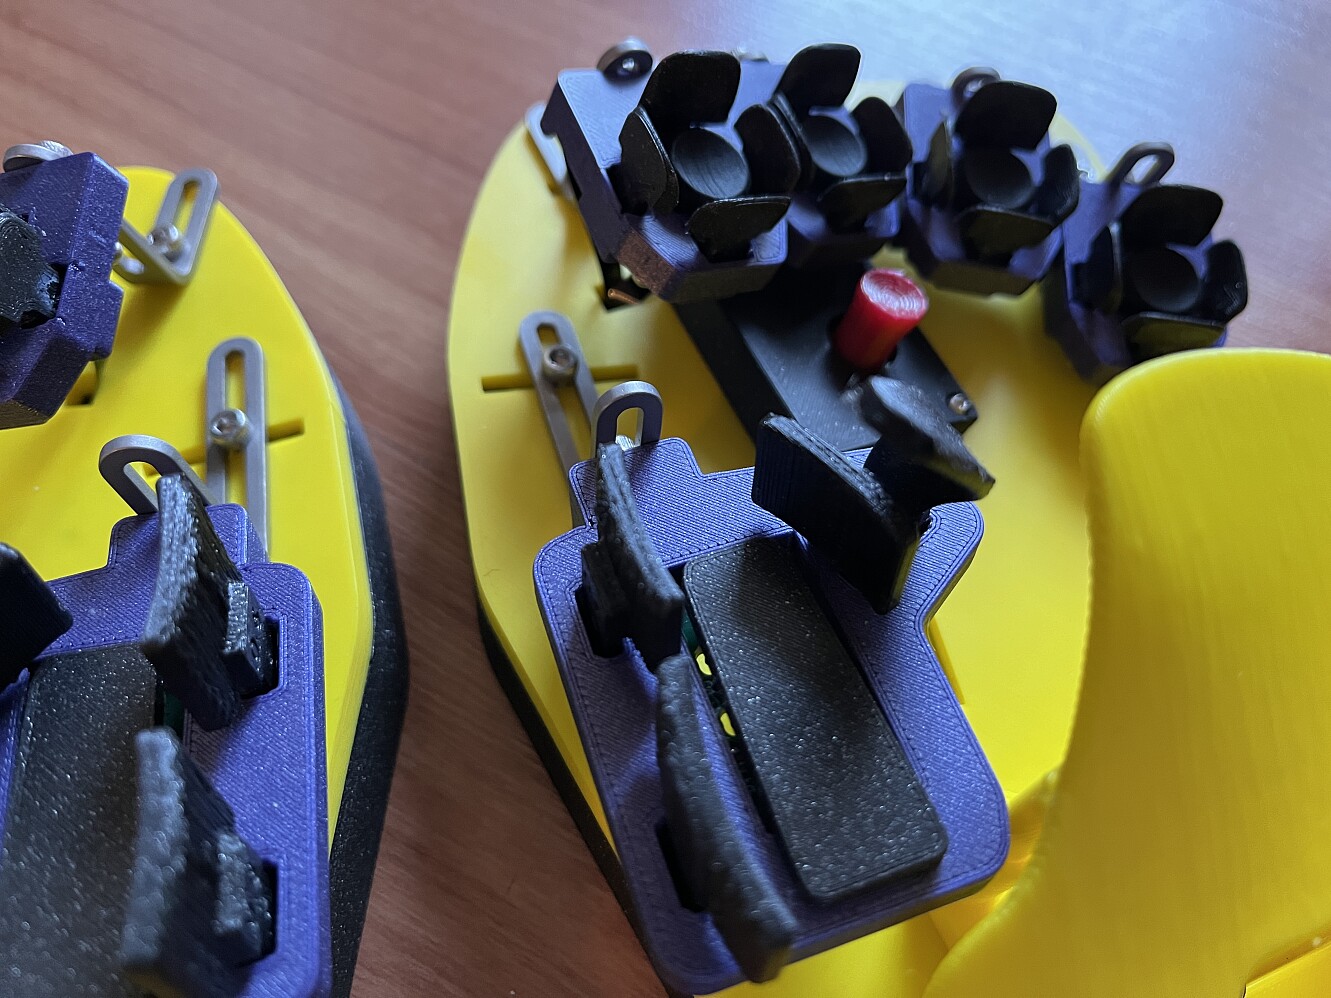
For each thumb, you have 5 keys plus a click.
- Thumb tip outward
- Thumb knuckle outward
- Thumb in
- Thumb up
- Thumb down
- When pressed down, more force creates a click action.
Trackpoint (Optional)
When the trackpoint is active, left hand index finger and pointing finger became mouse left/right buttons.
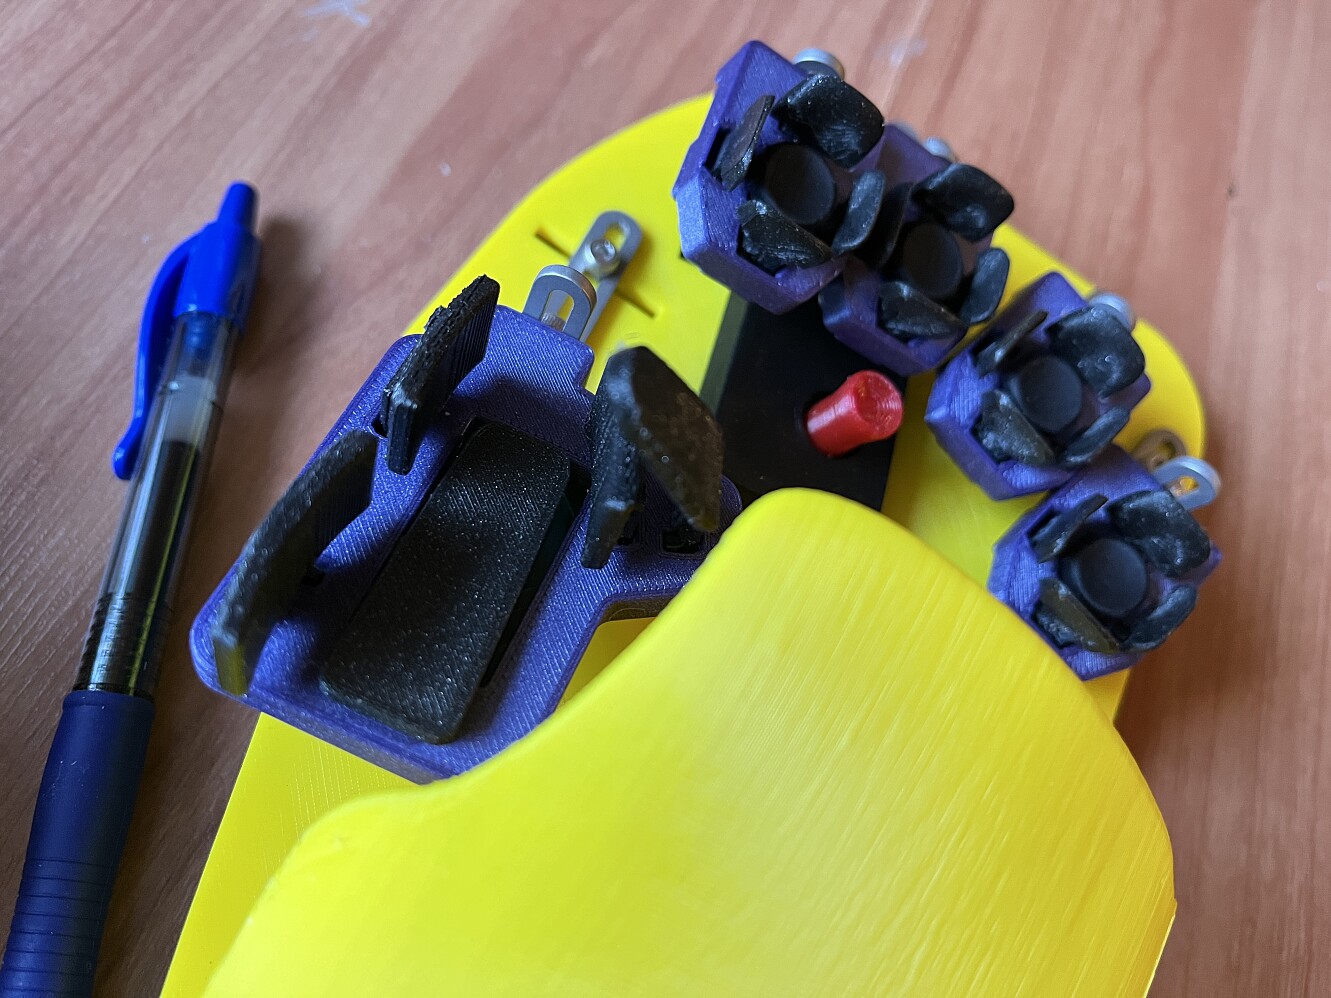
Adjustable Parts
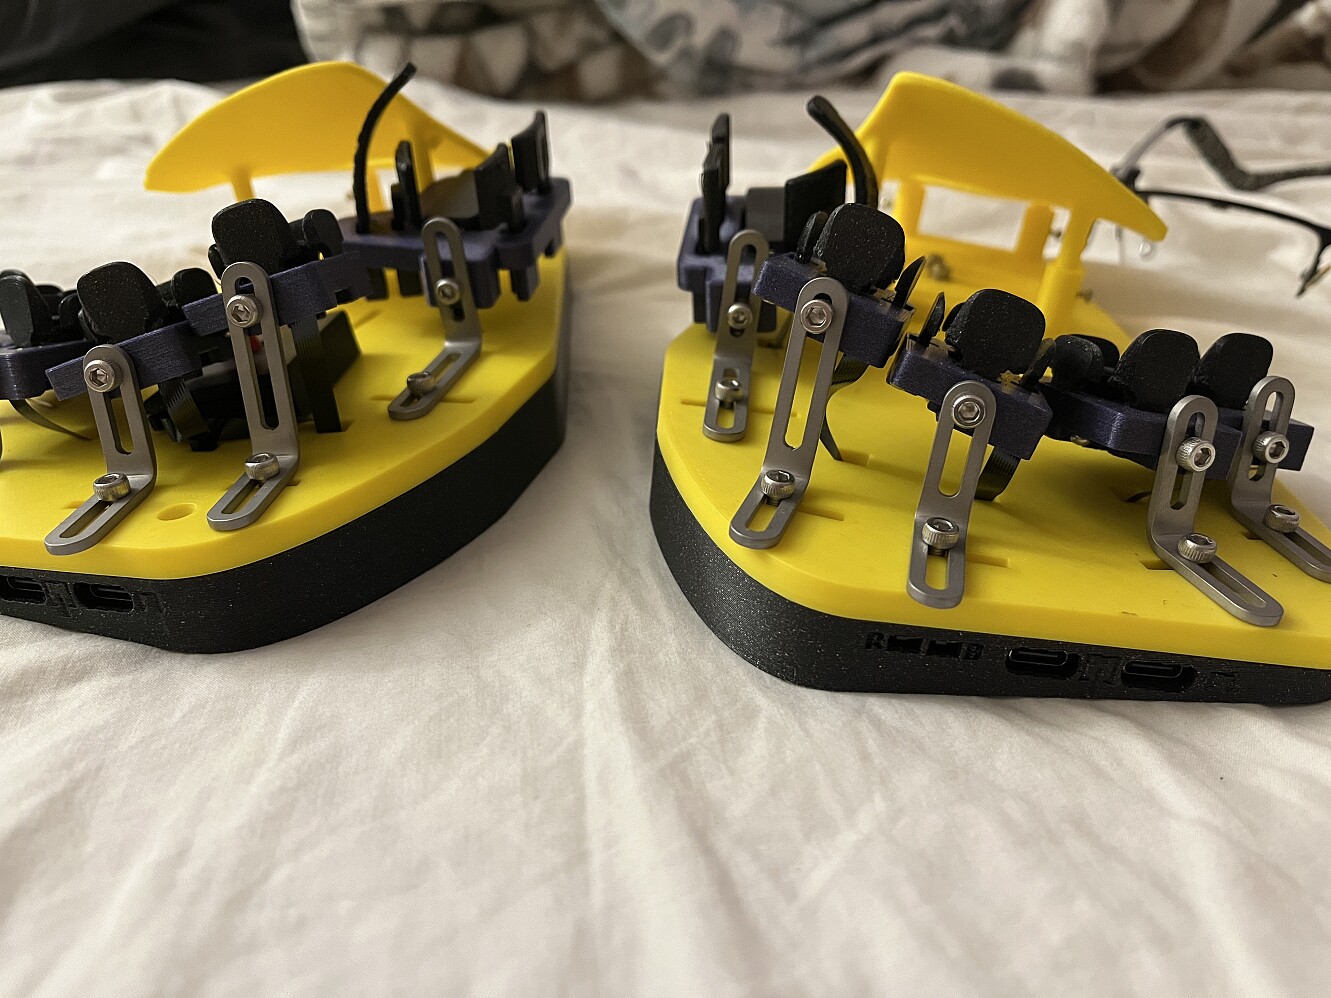
Each part is adjustable, for finger distance, thumb distance, palm distance, also, height of each.
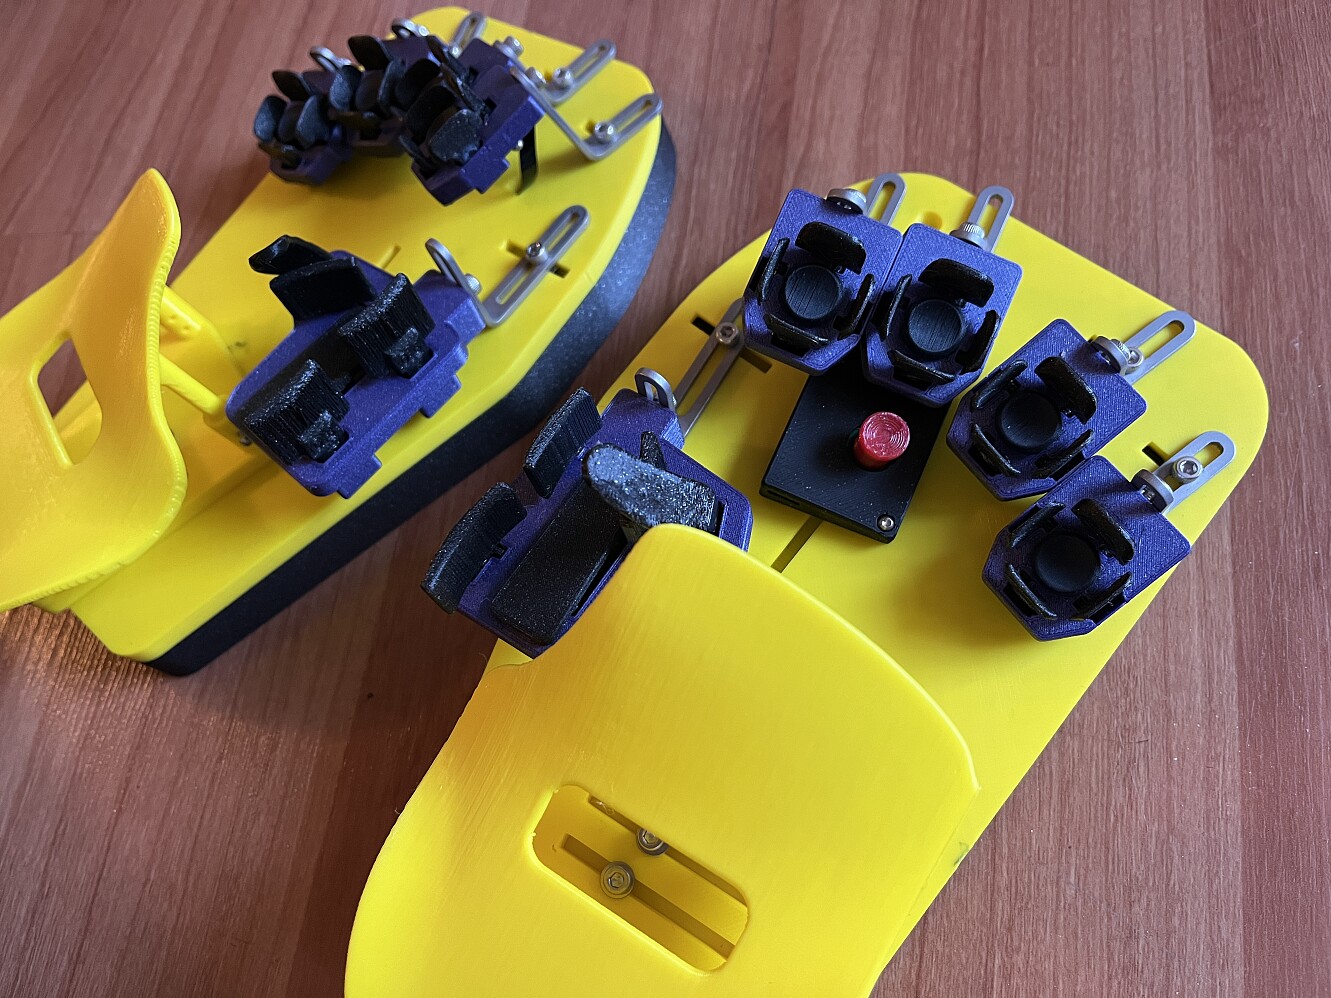
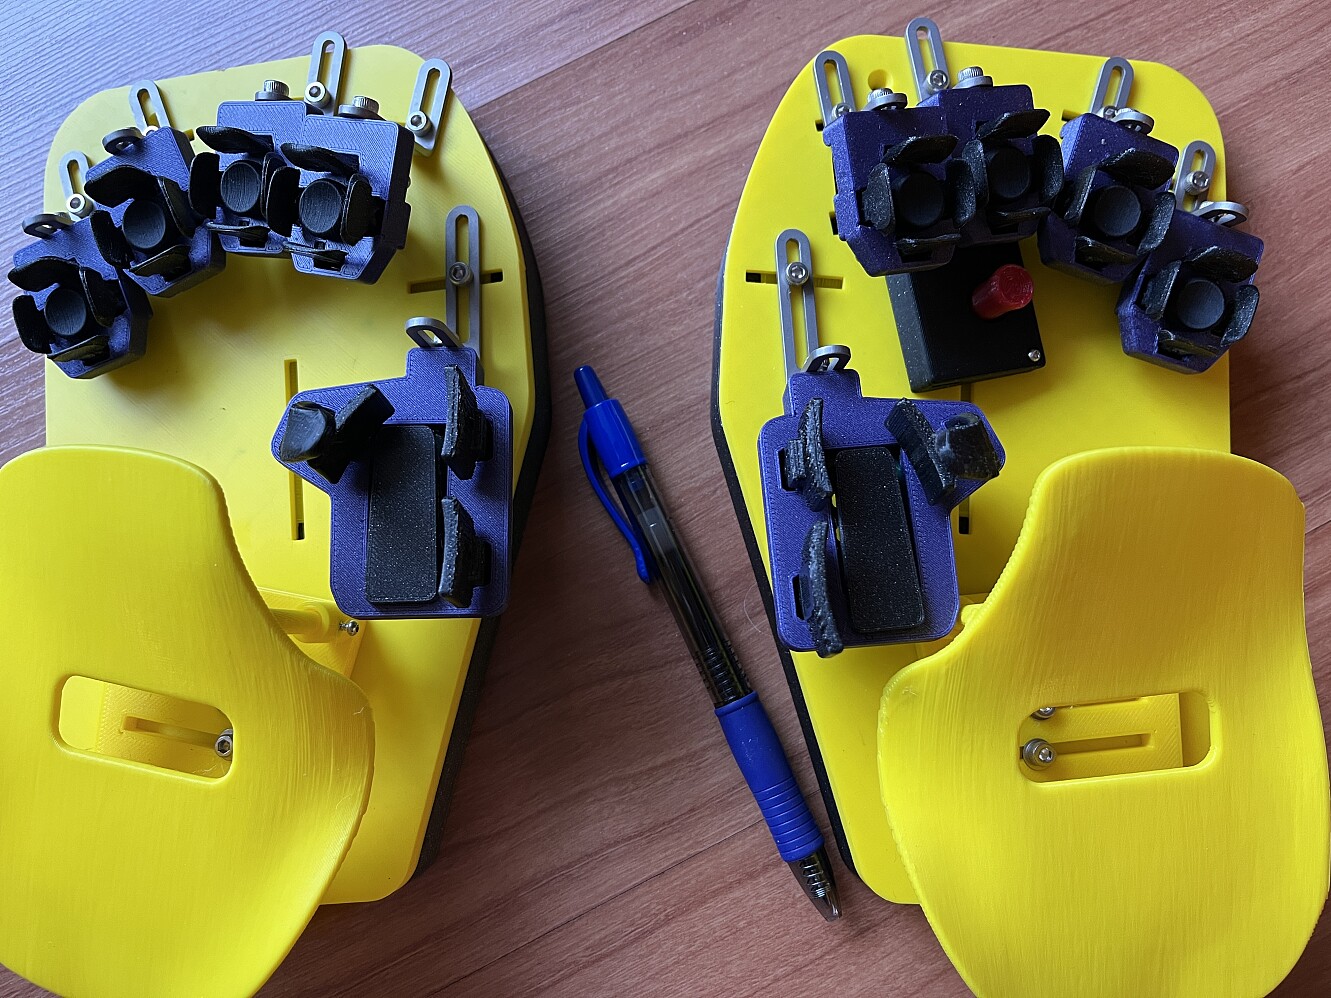
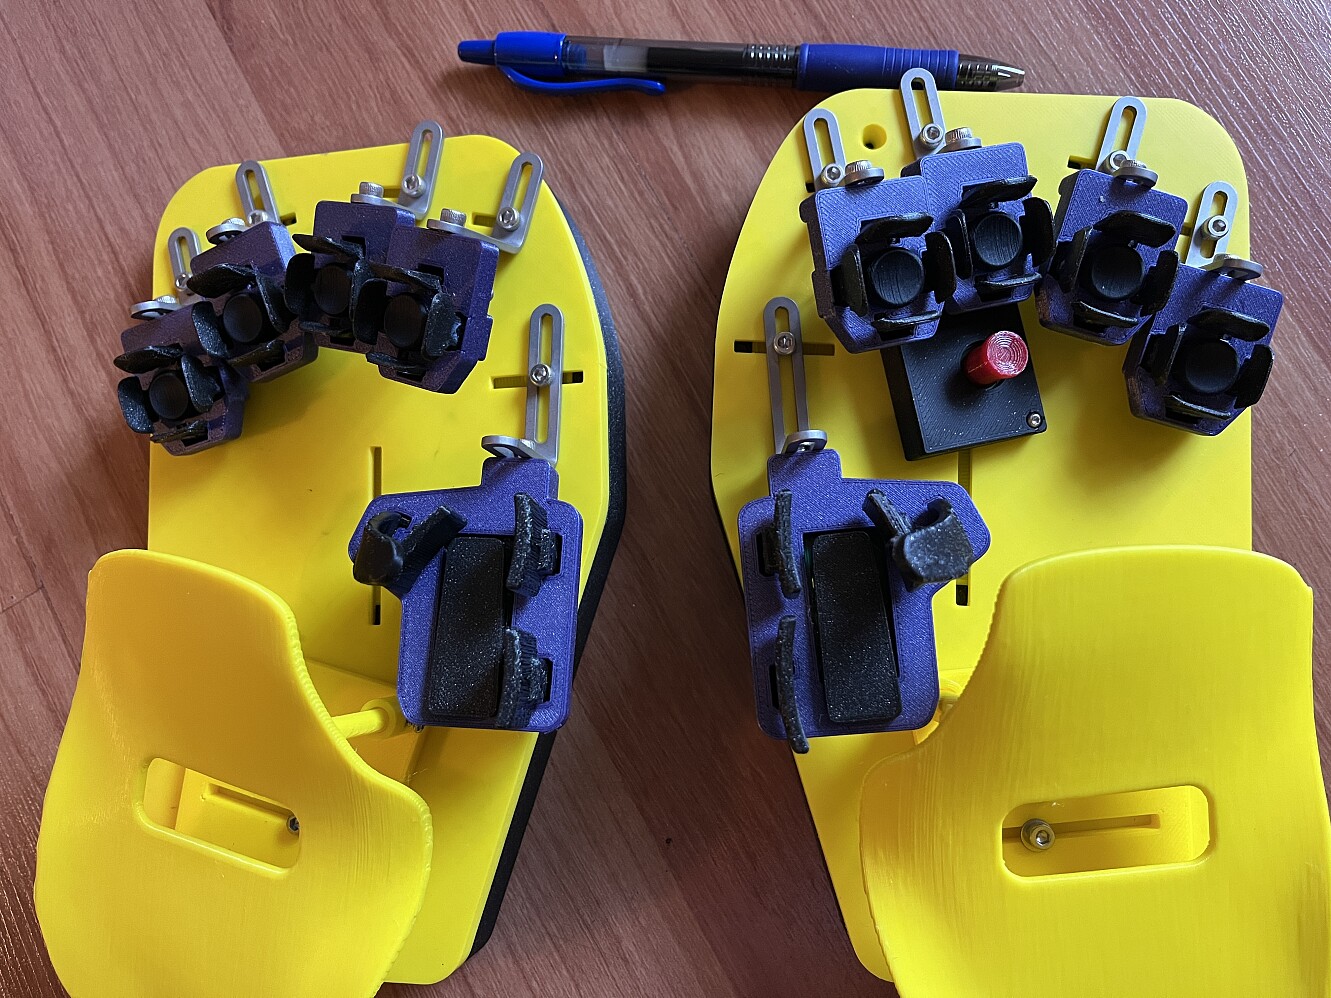
Tenting
Builtin tenting. That is, the pointing fingers are positioned higher than pinkies.
Magnetic Optical Key-Switch
This is one of the best thing.
The electricity switch mechanism is electric-opitical. There is a optical light beam inside each switch, when the beam is blocked, the key is activated. (depending on the switch design, sometimes when the beam is blocked, the key is deactivated.)
The key feel mechanism is magnetic. This is truly fantastic. Imagine a weak magnet, it keeps the key “door” or “flip” in its original position. When you push it, it dislodge the magnet, and once it is disloged, there is effectively no resistance, at all.
This means, during entire key travel, there is basically no resistance, except the initial.
Unlike a spring. In a spring based key switch, such as Cherry MX Switches, there is always a resistance.
Firmware, Programability
The firmware is QMK, and Vial software.
Vial is the most easy-to-use graphical software to program the keys. Just launch Vial, and you can use mouse to set keys via graphical user interface.
- Download Vial at
- https://get.vial.today/
Carrying and Maintenance Tips
- Do not put in a car. The plastic no like heat.
Default Layout


 Svalboard (Datahand)